Get your Substack on Google Part 2: Setup Search Console
Being visible on Google is crucial if you want your Substack to grow. Read on to discover the fastest way to get indexed.
Are you keen to extend the audience for your Substack? With Google dominating 92% of the market for online search they should be an important part of your strategy. This post will show you a direct way to enter the Google Search ecosystem and get your work indexed.
If you are interested in working on steady growth for your newsletter, be sure to read Part 1 of this series where you will learn about the importance of backlinks.
If you search hard enough, you will find a few articles out there already discussing how to get indexed on Google. Unfortunately the advice I discovered tended to be riddled with misinformation, often suggesting more steps than necessary. To add to the confusion, commenters were reporting that some advice no longer worked following changes to Substack settings.
Facing this mess I ventured out and ran a few experiments to see what actually does work. The solution below has been tested on three new Substack newsletters and it worked in all cases. Unless Substack changes its settings again it should work fine for you too. Let me know in the comments if you encounter any problems.
Google Search Console
Google gives the ability for website owners to directly request page indexing through a service called Search Console. Search Console is a tool that helps content creators monitor the activity of their work within Search results. It's full of useful reports and tools that you can easily get lost in. Let's keep this simple and focus on a single task: how to get your content indexed on Search.
Before you look at Search Console you need to set up a few things first. First you need to verify that you are the owner of the website that you are promoting. There are several ways you can do this but not all of them work for Substack sites. The simplest way is by adding an empty Google Tag to your Substack.
Here's a brief outline of all the whole process we’ll be covering today:
Create a Google Tag Container for your Substack
Copy the Tag Container ID into your Substack dashboard settings
Log into Search Console and add your Substack site as a property
Wait a couple of days for Google to process your site
Request page indexing on Search Console
Check if indexing happened
Add Search Console to your content creation pipeline
This might seem a lot at first glance, but the steps are easy and most only need to be done once.
Step 1: Create a Google Tag Container for your Substack
First things first, you'll need a Google account
Google has loads of free products and services which can be accessed through a single Google account. If you use any popular tools such as YouTube, Google Docs, or Gmail you'll already have an account set up. You'll need this account to use both Google Tag Manager and Google Search Console during this tutorial. If you want to create a new Google account just for this task you can do that too.
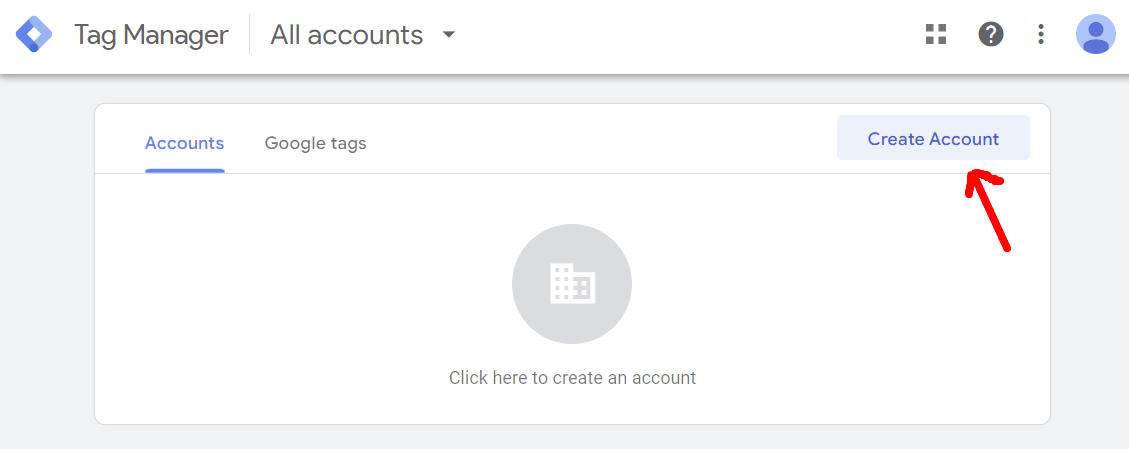
Log into Google Tag Manager:
Visit https://tagmanager.google.com/
Create a Tag Account and container for your Substack:
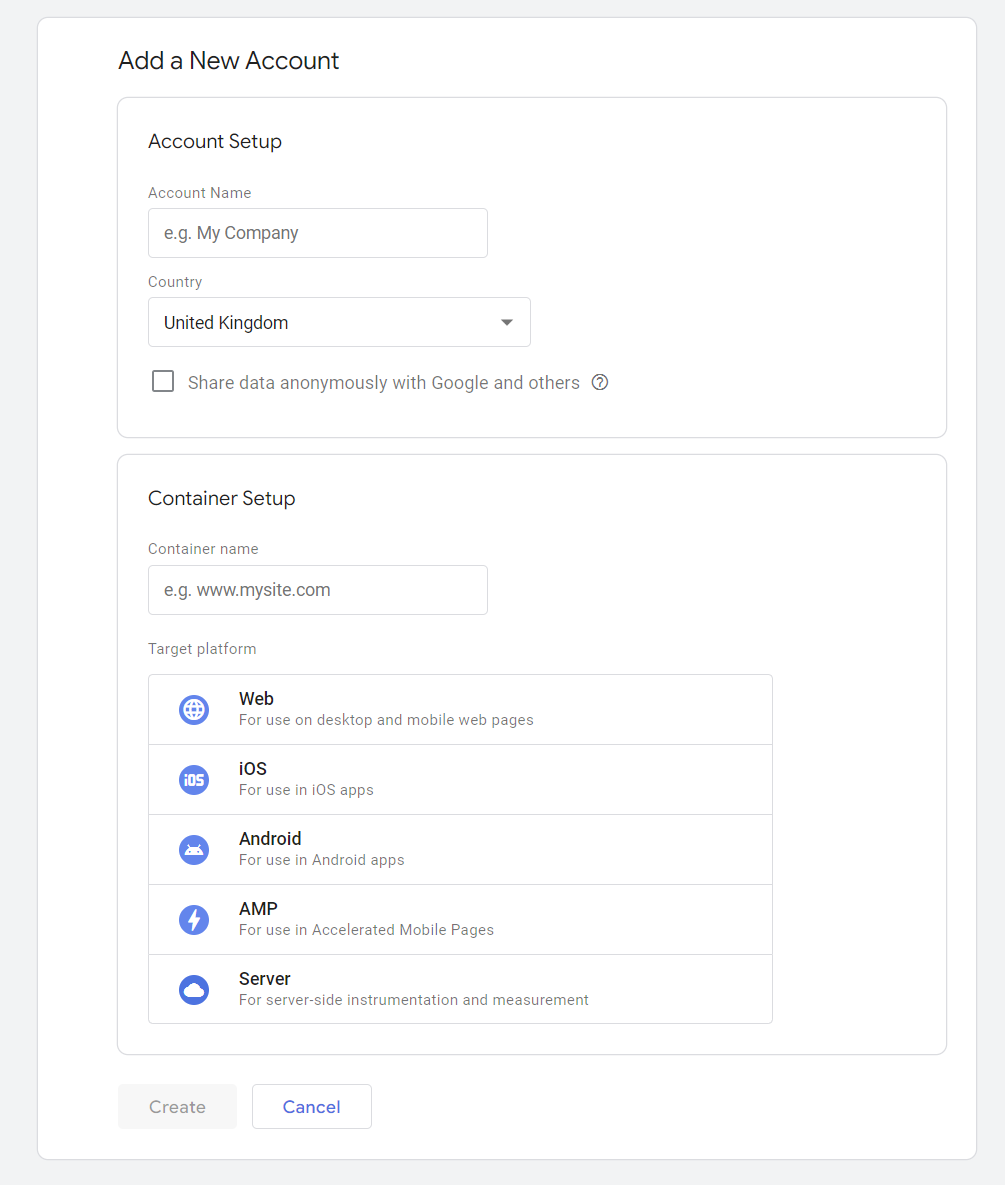
You'll see the following form to fill in:
Fill in with the form using the following template
Account name: your Substack title e.g. The System Reboot
Container name: yoursubdomain.substack.com e.g. boodsy.substack.com
Container type: Web
Click Create, and accept Google's terms of Service.
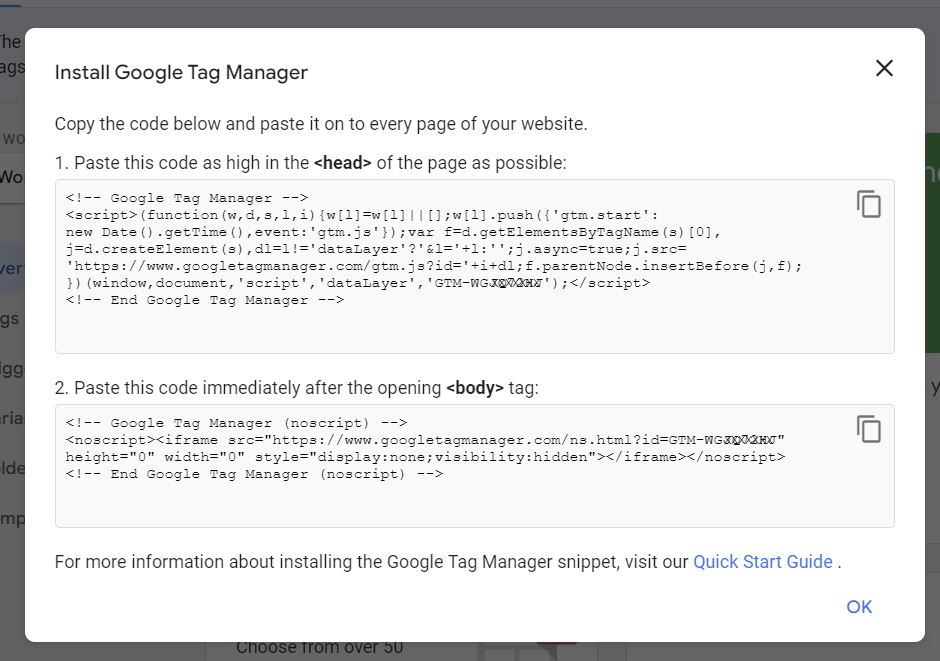
You will then be shown some code like the example below:
You don't need this. Just click OK.
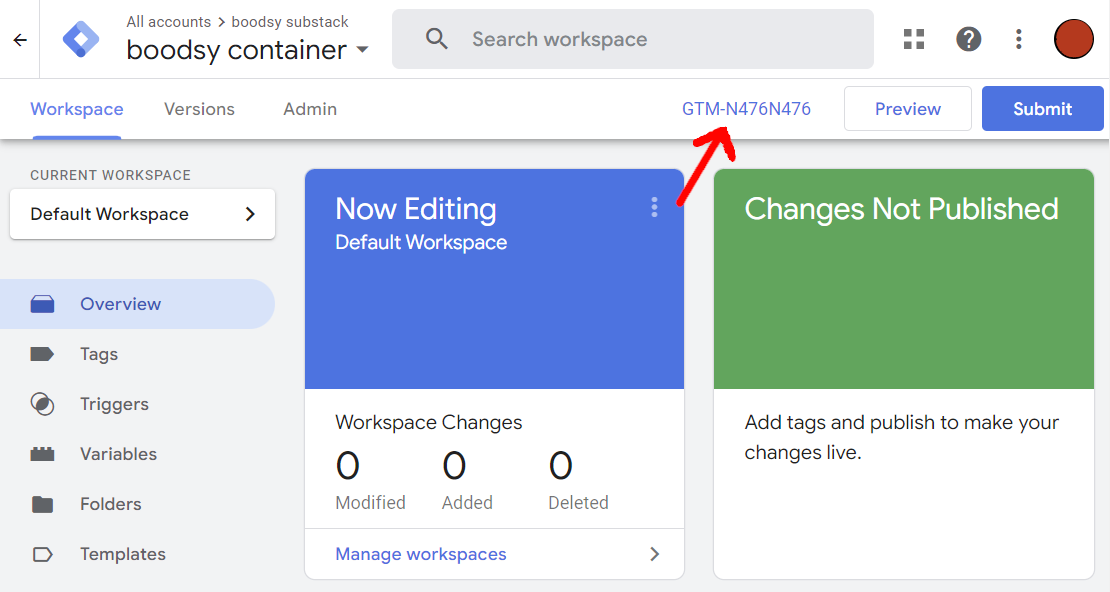
Google Tag Manager will generate an empty Tag Container ID for you. You can find it at the top of the page that is shown next:
It will have the following format: GTM-XYZXYZ. Take a note of your code. This is the important bit.
That's it for Google Tag Manager.
Step 2: Copy the Tag Container ID into your Substack dashboard settings
Log into Substack on your web browser. Click on Dashboard and choose Settings.
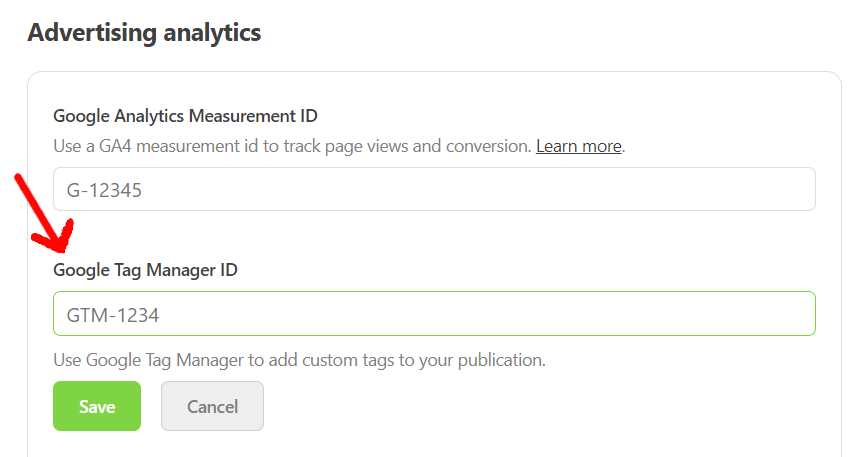
Scroll down to the Advertising analytics Section
Enter your Tag Container ID in the field called Google Tag Manager ID as shown below.
Ensure you don't add a space before or after the code or Google won't recognise it.
Then click on the Save Button.
Substack will now tag all your pages with this tag container id. It won't do anything because we set it up as an empty container. We just need it keep it there to verify you own the site. Search Console will periodically check for this so don’t delete it.
Step 3: Log into Search Console and add your Substack site as a property
Log into Search Console with the Google account you used to create the Tag Manager ID in Step 1 above. To do this visit https://search.google.com/search-console/about.
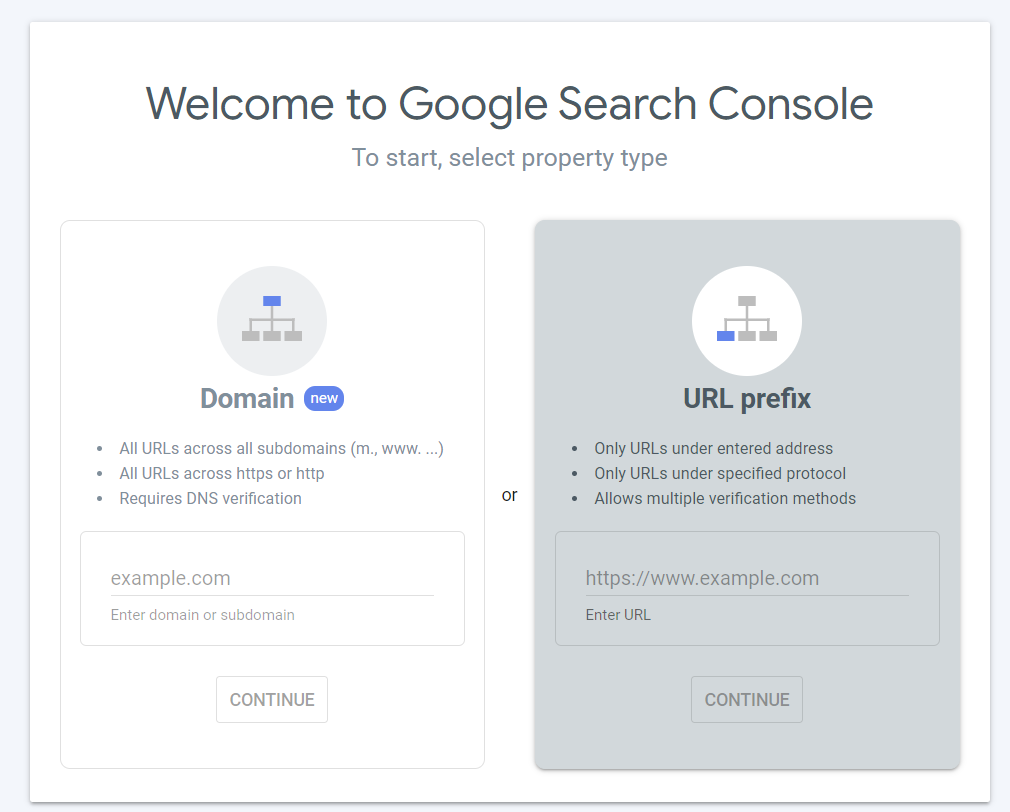
If you are new to Search Console you will be asked to create a property as shown below:
Choose the URL prefix option and enter your Substack URL.
(e.g. https://boodsy.substack.com).
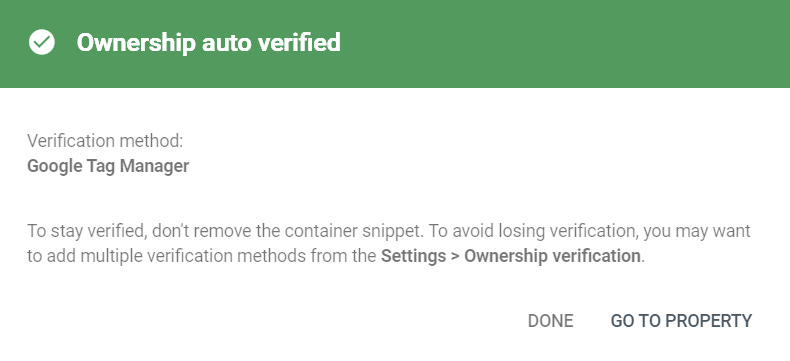
When I entered my URL Search Console automatically verified the ownership of the property and showed this popup:
If yours doesn't verify automatically then scroll down to the option to verify with the Google Tag Manager and try there.
N.B.The first time I tested this it did not work straight away. I went off for a coffee break and tried again later and it worked. The next two Substack newsletters I tested auto-verified without the need for manual intervention.
N.B.B. It seems that Google’s back end processes are now not so quick to complete. Some users have reported it can take up to 6 hours for them to join up the dots. So be patient if it doesn't work straight away and try later.
Step 4: Wait a couple of days for Search Console to process your site
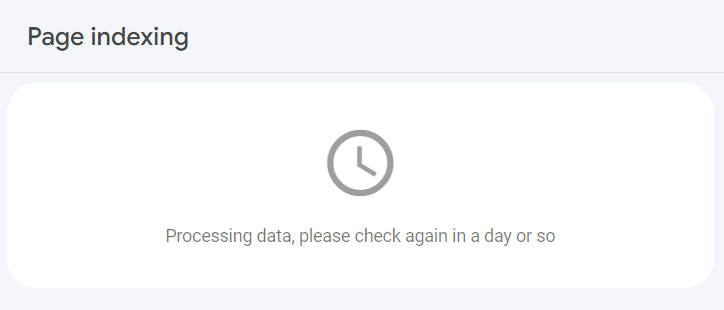
When you first verify your website on Search Console you won’t be able to do much for anything from couple of days to a week depending on the size of your publication. Google needs to set things up in the background first. I tried to manually index a few pages but was told to come back later.
You may get a message after a few days from Search console saying something like the following:
New reasons preventing your pages from being indexed
Search Console has identified that some pages on your site are not being indexed due to the following new reasons:
Excluded by ‘noindex’ tag
Blocked by robots.txt
This is quite normal. Substack puts those tags on comments pages and admin pages so they don’t show up in search results. If you have no posts on your site and haven’t deleted the Coming Soon page Substack automatically adds a noindex tag to all visible pages. When you start posting new content this is cleared. Keep in mind you only want to index your posts not all the other stuff you see when signed in.
Step 5: Request page indexing on Search Console
There are two ways to index your pages using Search Console: either you submit a sitemap or you submit pages individually.
Method 1: Submit a sitemap
A sitemap is a file that lists the addresses (URLs) of important pages on your website. You can’t generate a sitemap file yourself, Substack does it for you. Unfortunately not every Substack has one. I’ve done a quick survey and the more established newsletters seem to have them but the newer ones don’t. My hunch is that after you hit a certain threshold (say 100 subscribers) Substack will start generating it for you.1
You can check if your stack has one by going to a web browser and entering a sitemap URL similar to the one below:https://substackname.substack.com/sitemap.xmlSwap substackname for your own Substack title. (if you have a custom domain use that instead)
Unfortunately my browser responded unfavorably:
If you get similar results, don’t worry, you can still index your pages but will have to use method 2 below.
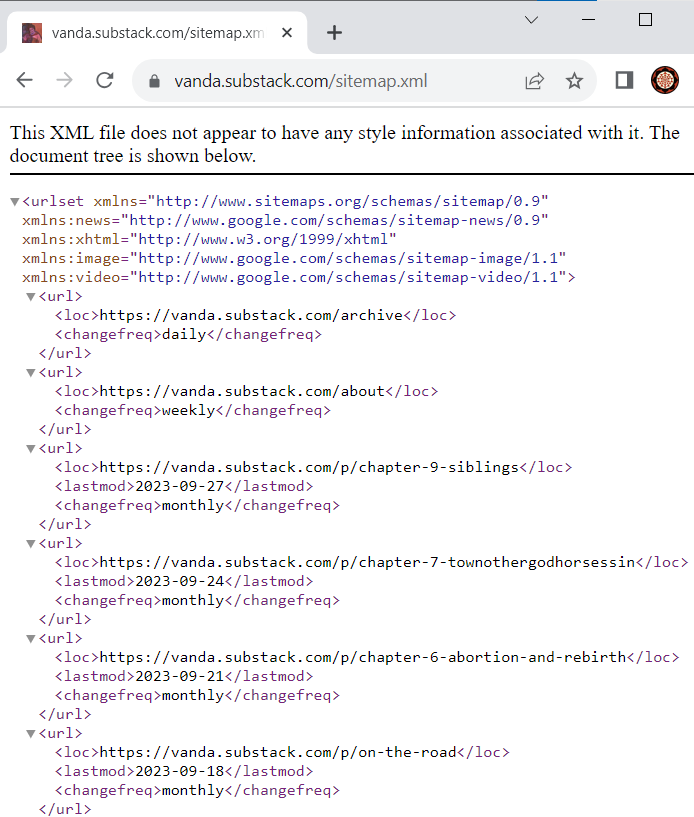
When I checked the URL for
my first subscriber it looked more promising:Her site is already being indexed by Google and has a sitemap. She could be patient and wait for Google’s crawlers to discover changes to this file and her new content will be picked up and indexed. Alternatively, she can submit her sitemap directly to Google on Search Console for priority indexing.
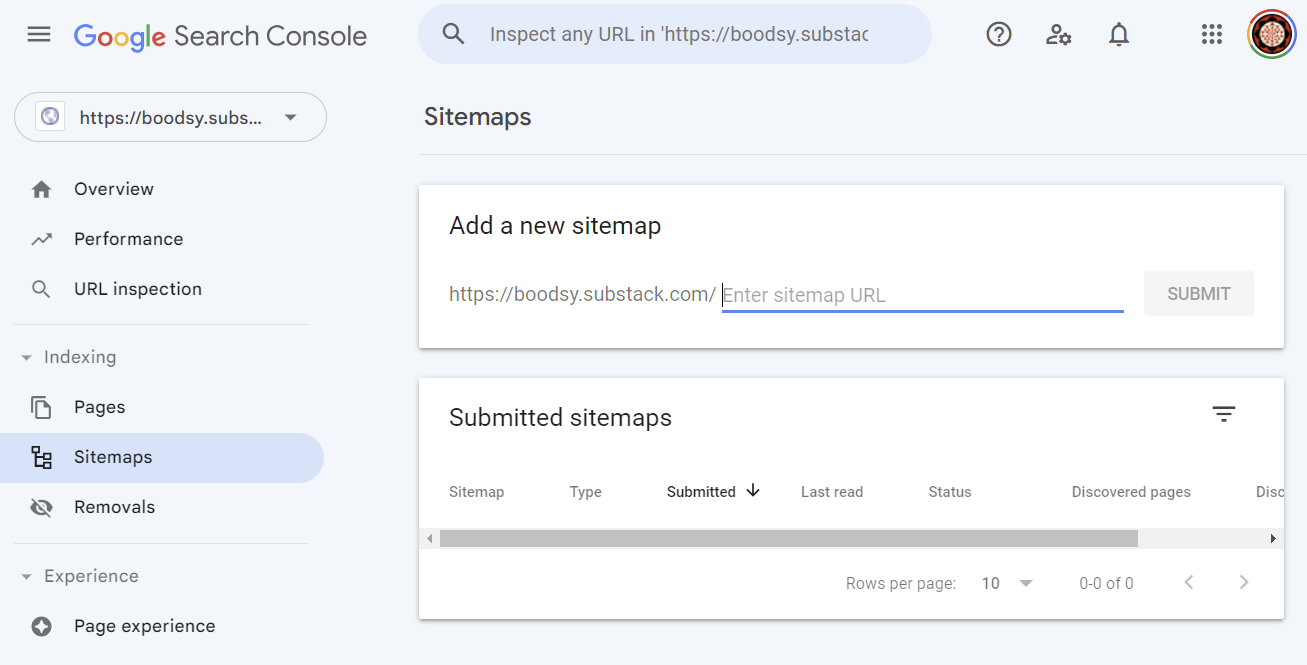
To do this you choose the Indexing | Sitemaps option as shown below:
Complete the sitemap URL here and click Submit. That’s it! The sitemap file will be added to Google’s crawl list and pages will start to get indexed in a few days.
Method 2: Submit pages manually
To submit a page manually you need to use the URL Inspection Tool. This is the name for the Search box located at the top of Search Console:
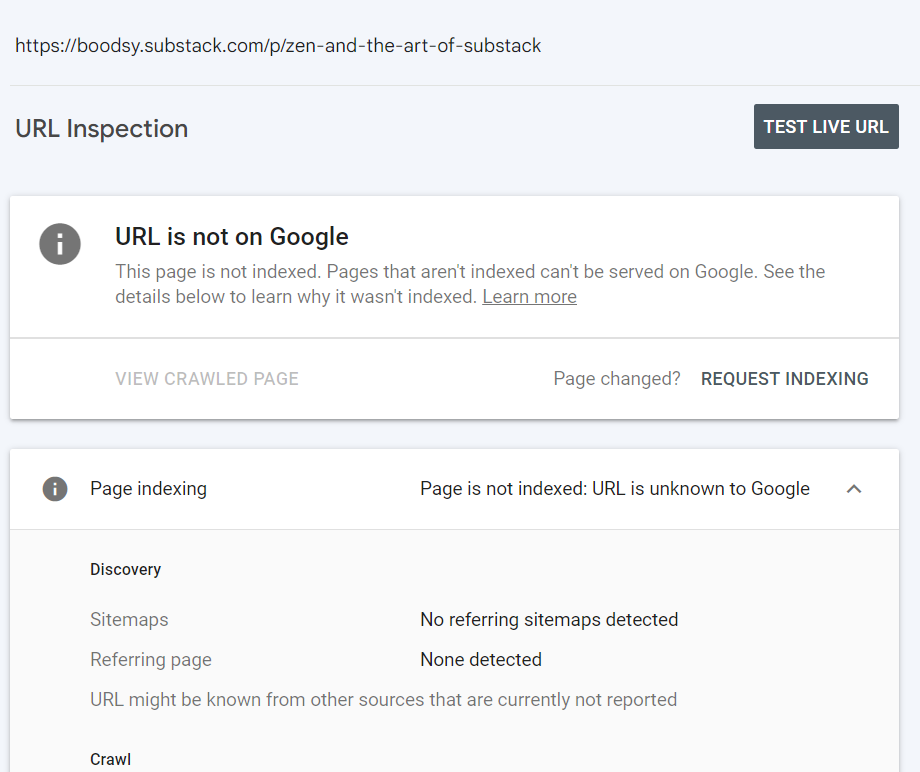
I entered the address for my previous post Zen and the art of Substack and got the following output:
I just need to click on REQUEST INDEXING and the page will be added to the crawl lists. That’s it!
Initially Google limits how many pages to can submit manually. If you just verified your site with Search Console you may need to wait a few days before this will start working. Some people might see a quota exceeded message that prevents you making more than one request for a few days. My best guess is that this barrier is in place to prevent spam sites overloading the system. Don’t worry, wait a few more days and this should clear down.
Step 6: Check if indexing happened
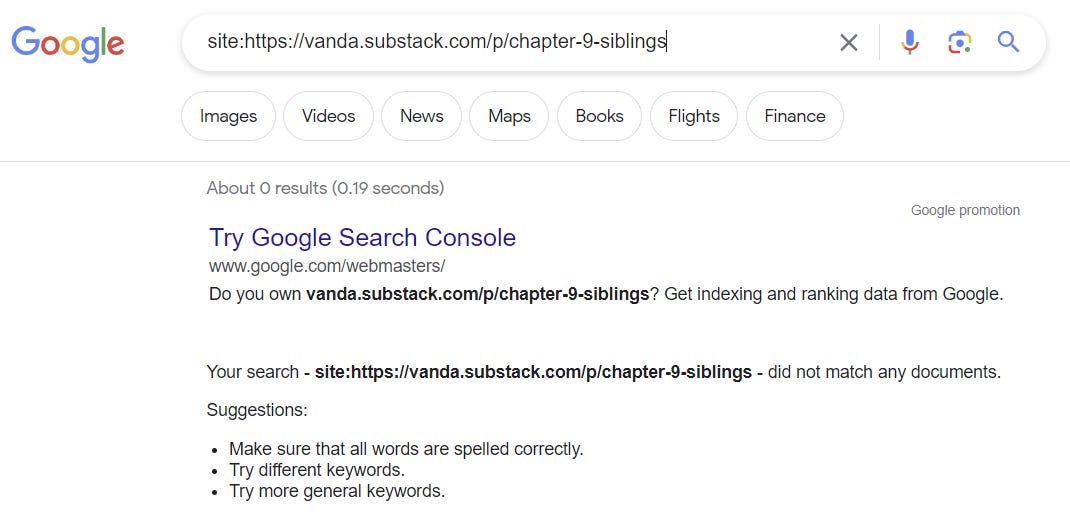
Indexing is not immediate, it can take a few days to complete. You can do a quick check on Google Search using a site: query to check if a URL shows up. As an example I’ll check the newest installment of Vanda’s memoir below:
As you can see it’s not showing yet. It was only posted a few hours ago so that’s to be expected. To get a more accurate answer for a page, run the URL Inspection Tool within Search Console.
Step 7: Add Search Console to your content creation pipeline
If Substack is creating a sitemap for you then you probably don’t have to worry about each future post showing up within Search results. They will get there eventually. If you don’t have a sitemap or are in a race then you might want to add a Search Console task to your content creation pipeline:
After you publish a new post on Substack take a copy of the link (URL)
Go into Search Console
Run the URL Inspection tool for that URL
Click on REQUEST INDEXING to get it on the crawl lists
Okay that’s all folks. If this post has helped you in any way, click on subscribe below and I’ll keep you informed with more useful hacks and other interesting thoughts about how technology impacts our lives. It’s free!
In my next post you will learn it is not enough to be listed on Search. Millions of sites are indexed. Read more about how to check your appearance in Search in Part 3: Stand out in Search . See you there!
The sitemap on my Substack started to appear 19 days after I posted my first article. I had not hit 100 subscribers but I did have over 600 views of my posts.




Substack should replace their A.I. tech support with you.
I literally just followed this guide and the whole process works as expected! Thank you so much for your help, it is much appreciated!